.jpg)
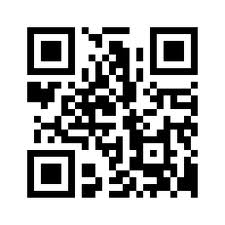
If you’ve been in a public space in the last year or two, you’ve probably seen a QR code—a small, square two-dimensional barcode that looks a bit like a miniature crossword puzzle. They’ve been around for more than 15 years, but they’ve recently exploded in popularity, thanks to smartphones, which are perfect QR-scanners.
Unlike traditional supermarket-style barcodes—which codify an identification number—QR codes are binary representations of numbers or letters, and can be many different sizes. A tiny QR code can represent just 30 numbers, and a giant one can represent thousands of letters, numbers, and punctuation marks. With that much flexibility, everyone can find a use for QR codes. In this article, we’ll show you how to make a distinctive, personalized QR code to put on your business card, or anything else.
Step 1: Get Your vCard
We’re going to avoid the obvious joke here and let you know that vCard is a standard for digitally transmitting contact information. You might have encountered a vCard attached to an email message in the past, but they work great in QR codes, too—most QR reader apps are designed to detect vCards and automatically enter the data into the phone’s contact list.
There are plenty of sites that will create a vCard QR code for you automatically (just a Google search away), but we recommend the web app here.
There, you simply click the Select a Code Action drop-down box, and select Create a vCard. Then, enter your personal information into the boxes below (image above), and hit Generate Code. Note that QR code size is dependent on the number of characters encoded, so you might find yourself dealing with a giant, unwieldy code that will be hard to fit on a business card. To get it down to size, we recommend using only vital information, like your name, phone number, and email address.
Another way to get around having a huge QR code is to have a personal website with your contact info (perhaps in a downloadable vCard) and to embed a link to that in a QR code. You can use a link shortener to make the URL and QR code as small as possible, which you will want for the next section.
Step 2: Personalize Your Code
One downside to QR codes is that by default they look a little impersonal. If you want to give your business card some visual appeal, there are a couple of simple things you can do. For one, you can give it a more interesting color scheme. The QR code generator we recommended defaults to black-on-white, but you can tell it to use any color for the foreground or the background. Make sure the background is lighter than the foreground, and that there’s decent contrast between the two. Otherwise, reader apps may have a hard time with it.
An even neater-looking trick, and one that’s still easy to pull off is to use a subtle color gradient. To do this, just open your image editor of choice (Photoshop and the free GIMP both work great), create a color gradient, and then use your QR code as a mask for that layer (image below).
If you want to go a step further by introducing a logo into your QR code, that’s entirely possible, as well. Just make sure to use the highest error correction setting (this can be set in the web app we recommended earlier) when you generate your QR code. This will make the code larger, but will allow it to be read even if up to 30 percent of the code is erased and written over.
For best results, don’t place your graphic or logo over the tracking boxes in the corners of the code. With some trial and error, you should be able to find out what scans and what doesn’t (image above).
Δεν υπάρχουν σχόλια:
Δημοσίευση σχολίου